Open another branch
Run more than one shop, store or branch from one account. Each branch has its own stock, bills, cash and POS counters. Your products, customers and suppliers are shared, and you sign in once for all of them.
Before you start
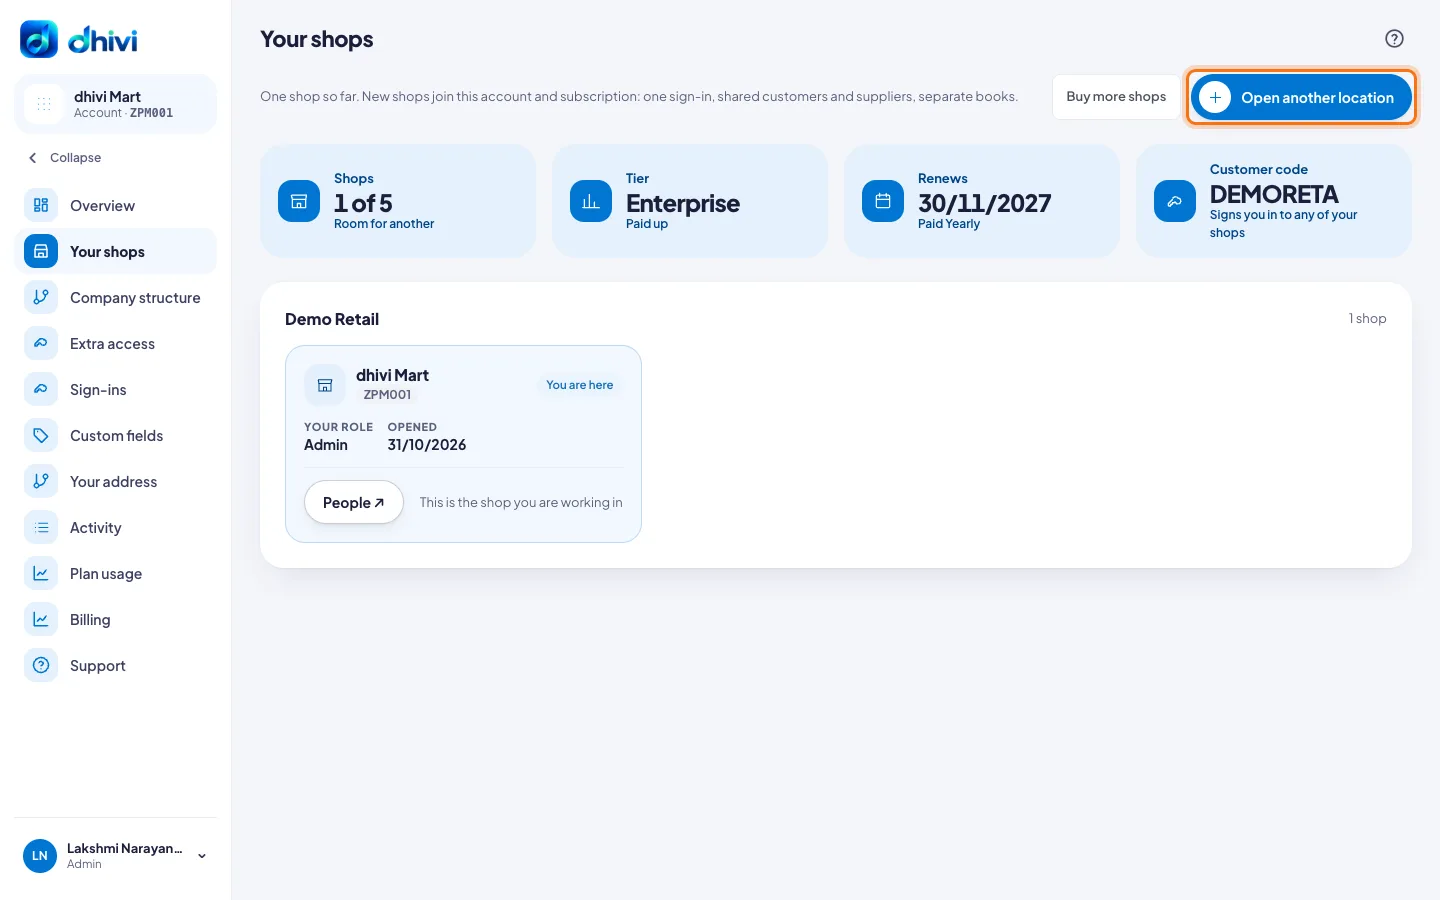
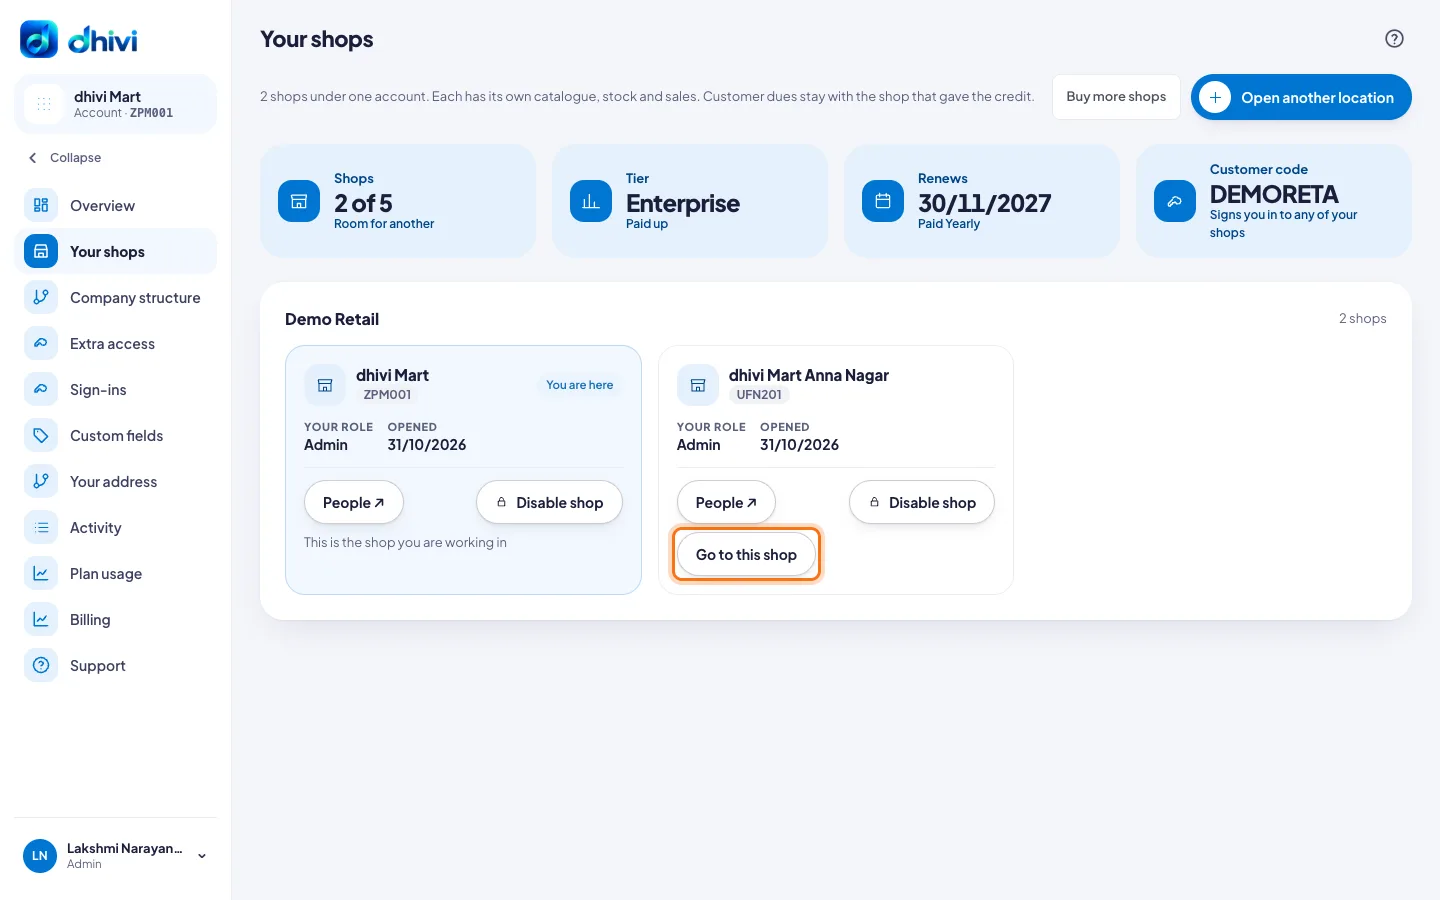
- Your plan decides how many shops you can have. The Your shops page shows it, for example 1 of 5.
- Only an Admin can open a branch.
Open the branch
- Sign in and open your account page.
- In the menu on the left, click Your shops.
- Click Open another location.
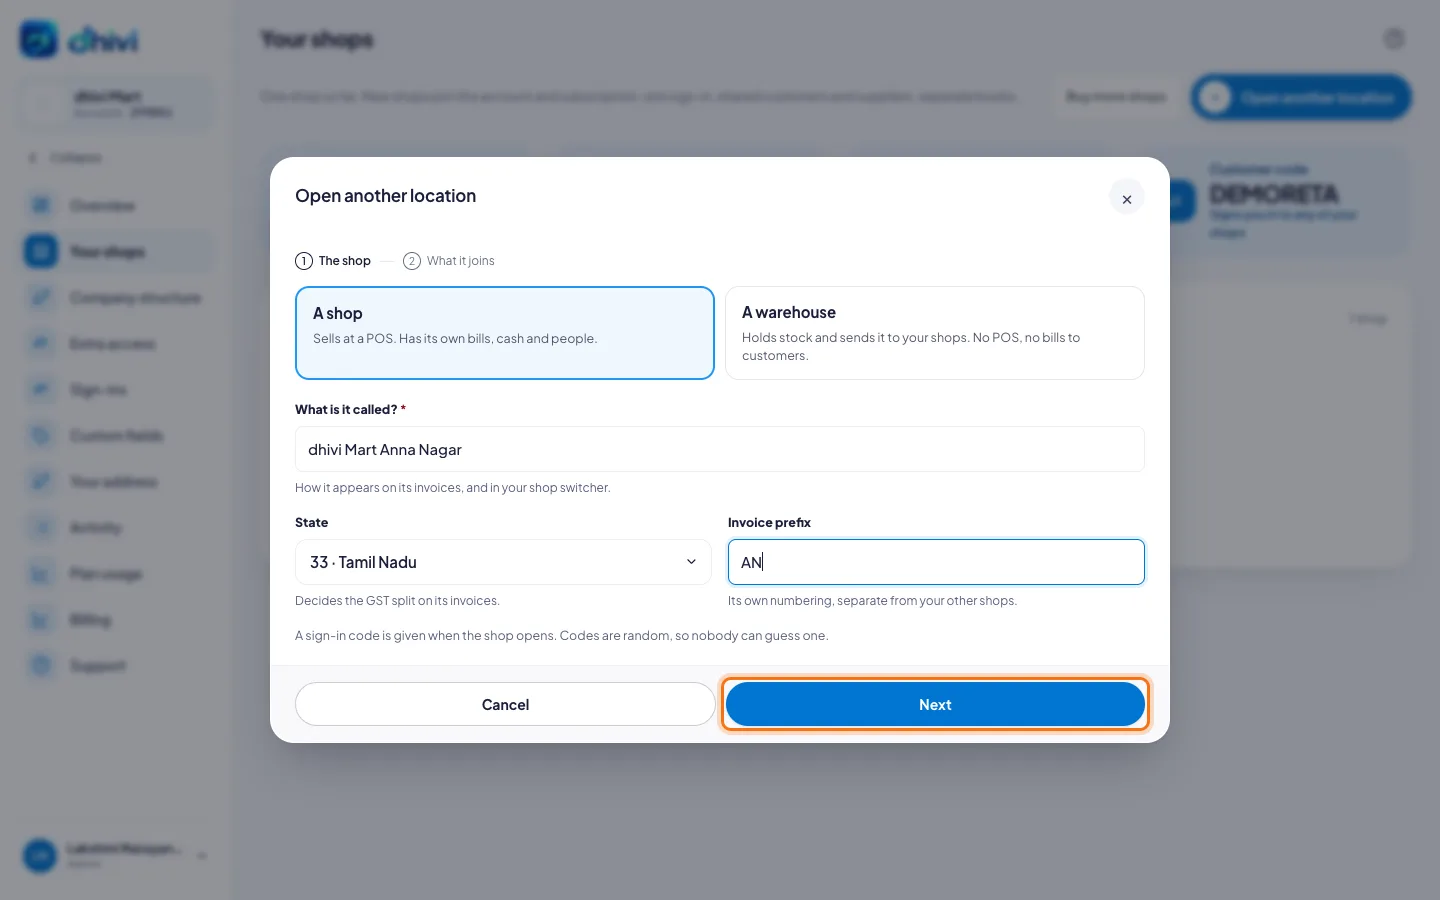
- Pick A shop. (Pick A warehouse for a place that only holds stock and sends it to your shops.)
- Under What is it called?, type the branch name, for example dhivi Mart Anna Nagar. It prints on the branch's bills.
- Pick the State the branch is in. It decides the GST on its bills.
- Type an Invoice prefix, for example AN, so its bill numbers are different from your other shops.
- Click Next.
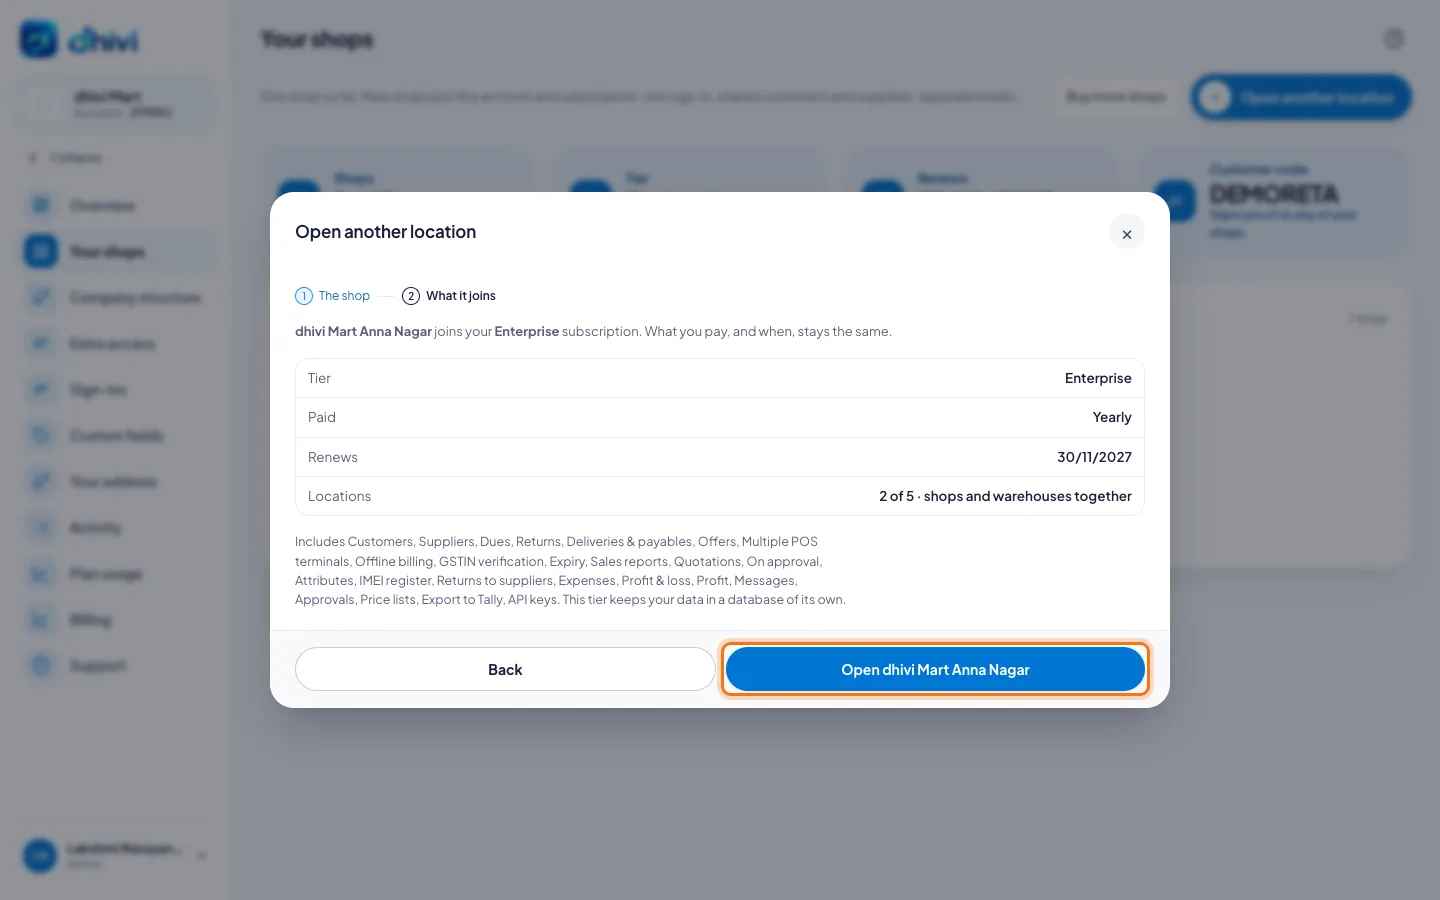
- Check that the branch joins your plan. There is nothing extra to pay.
- Click Open — the button shows your branch's name.
Your shop is open
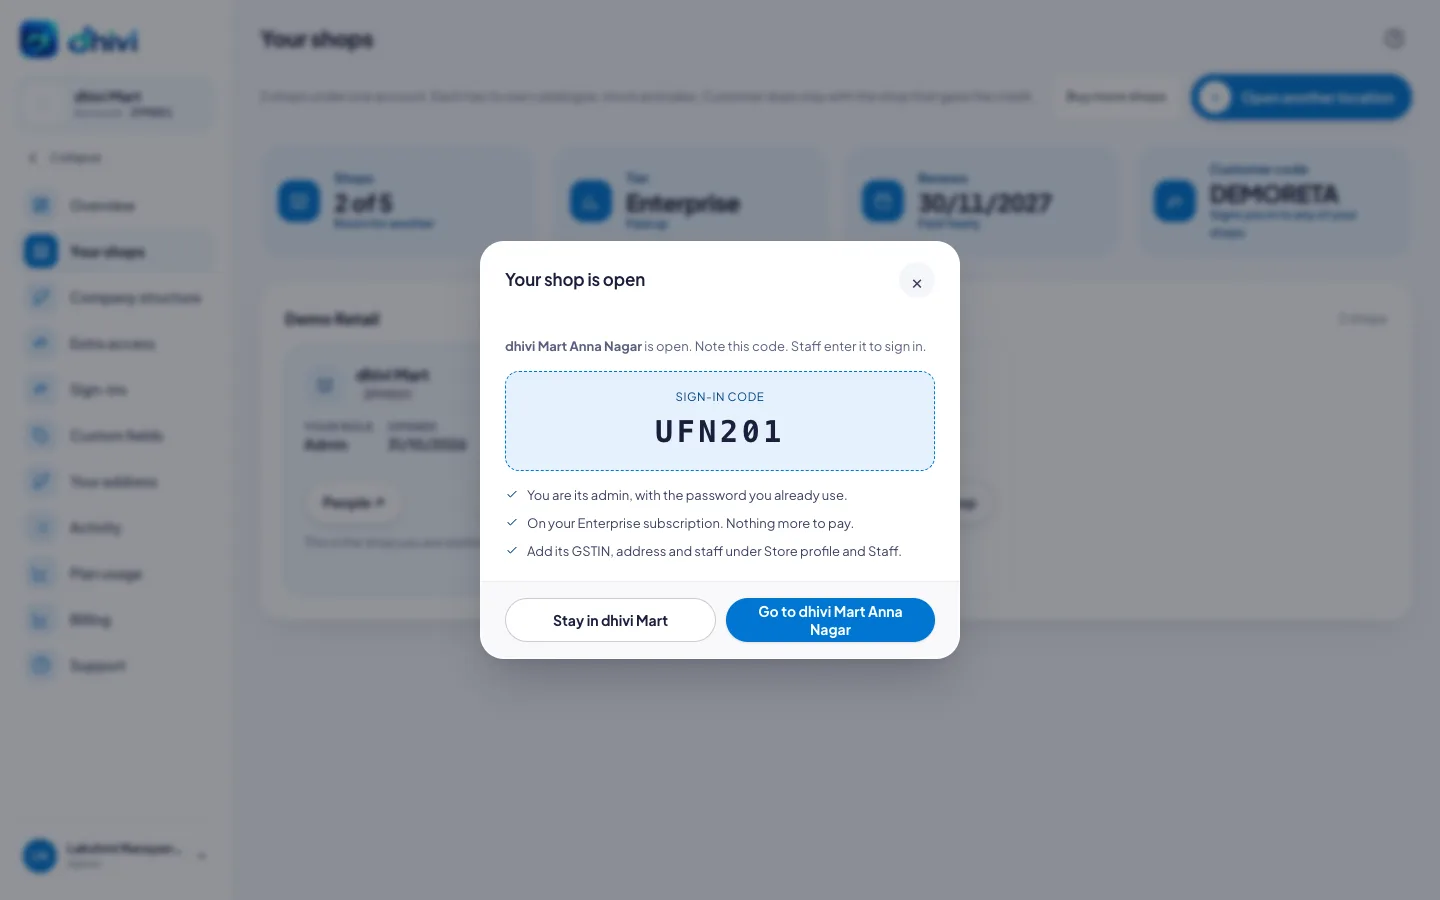
- Click Go to the new branch to set it up now, or Stay in the shop you are in.
You are the new branch's admin, with the password you already use.
Give your staff access
Staff do not get the new branch by themselves.
- Open the back office of the new branch, and click People under Setup.
- Click Add a person and type their Mobile number.
- They are found, because they already work at your other shop. Pick their Role at the new branch.
- Click Add.
They sign in at the new branch with the same email or mobile number, password and PIN they already have.
Work in one branch or all of them
In the back office, the shop picker at the top of every page says which shops you are looking at. All shops shows them together. Click Only beside a branch to look at just that one.
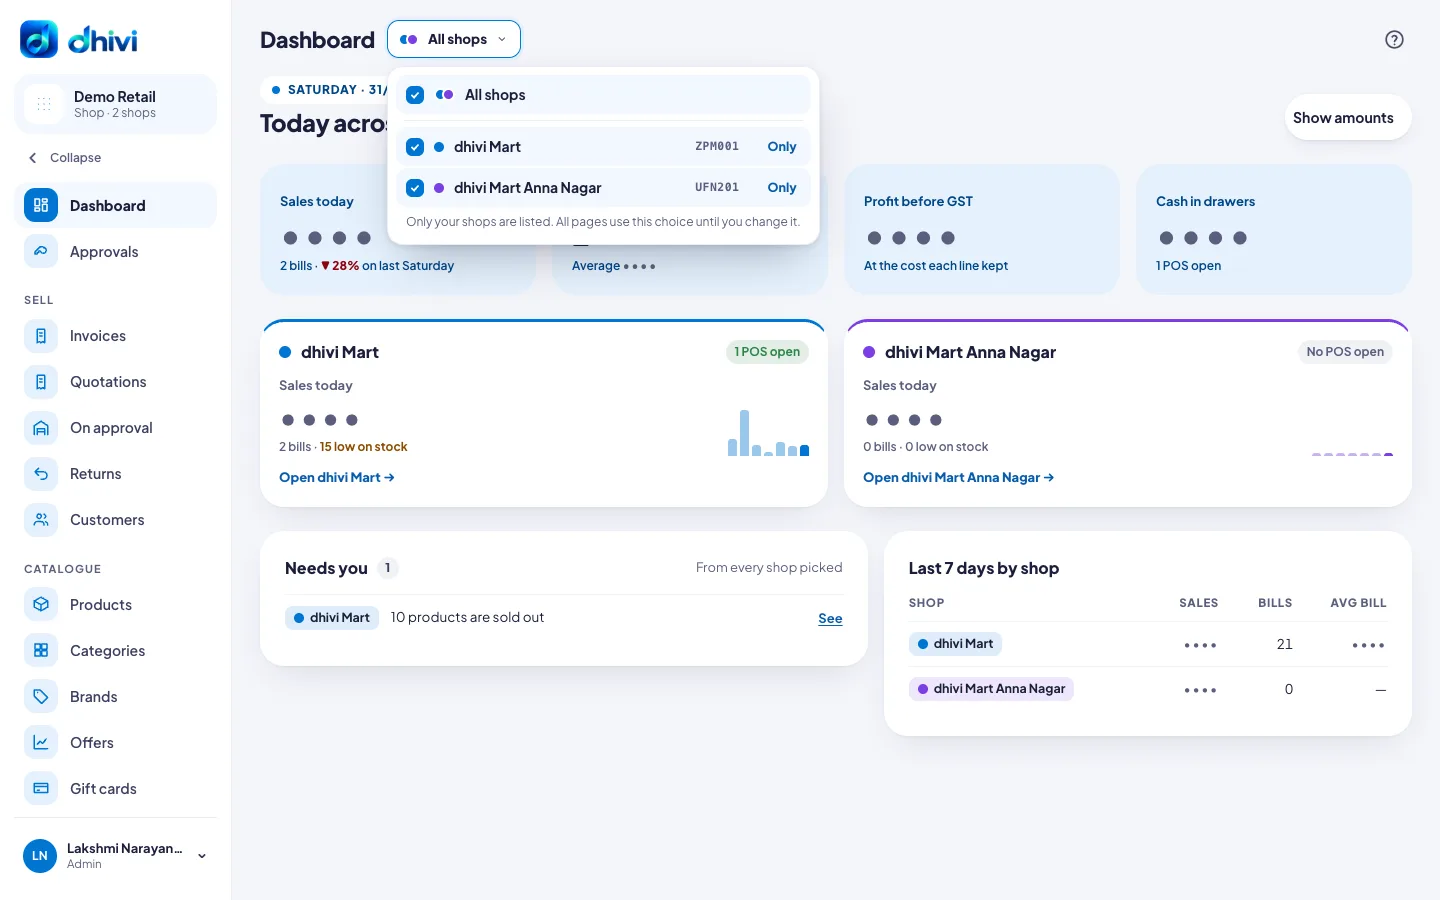
The choice stays on every page until you change it. On your account page, Your shops has Go to this shop on each branch.
Set up the new branch
In the back office of the new branch:
- Fill in its store profile: address, phone and GSTIN.
- Add a POS counter for it.
- Choose which products it sells, and give them opening stock. See Add a product.
Good to know
- What a customer owes stays with the branch that gave the credit.
- A warehouse counts as a shop on your plan. A disabled shop does not. See Disable or enable a shop.
- Reached your plan's limit? Open another location says so. Click Buy more shops to add shops to the plan you have; see Buy more shops. Or move to a larger plan; see Change your plan.