Add a product
Add each item you sell once — for your whole business. The POS then finds it by name or barcode.
Steps
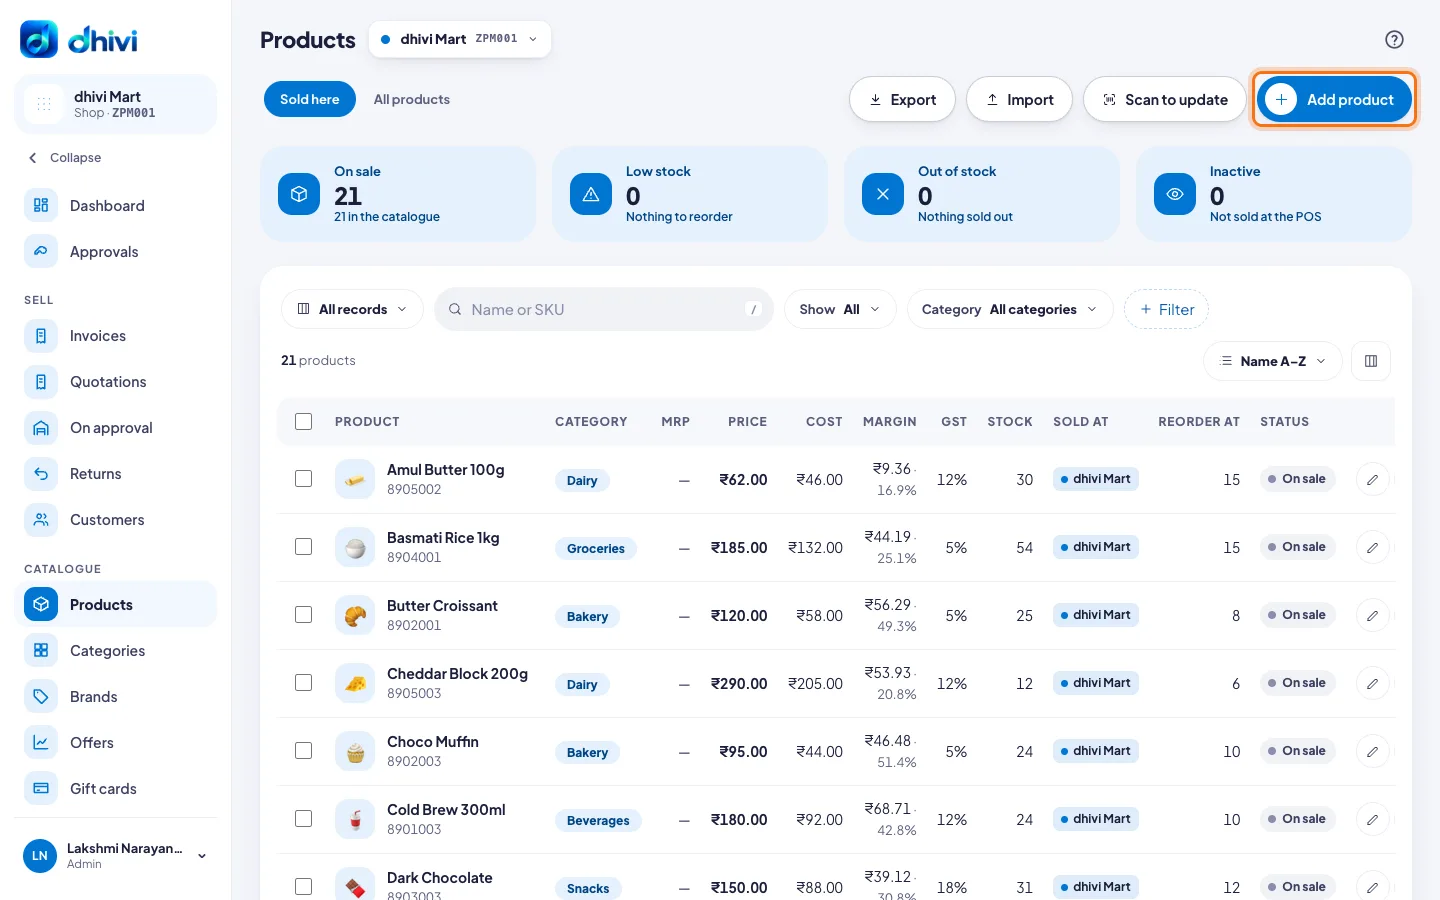
- In the back office, click Products in the menu.
- Click Add product.
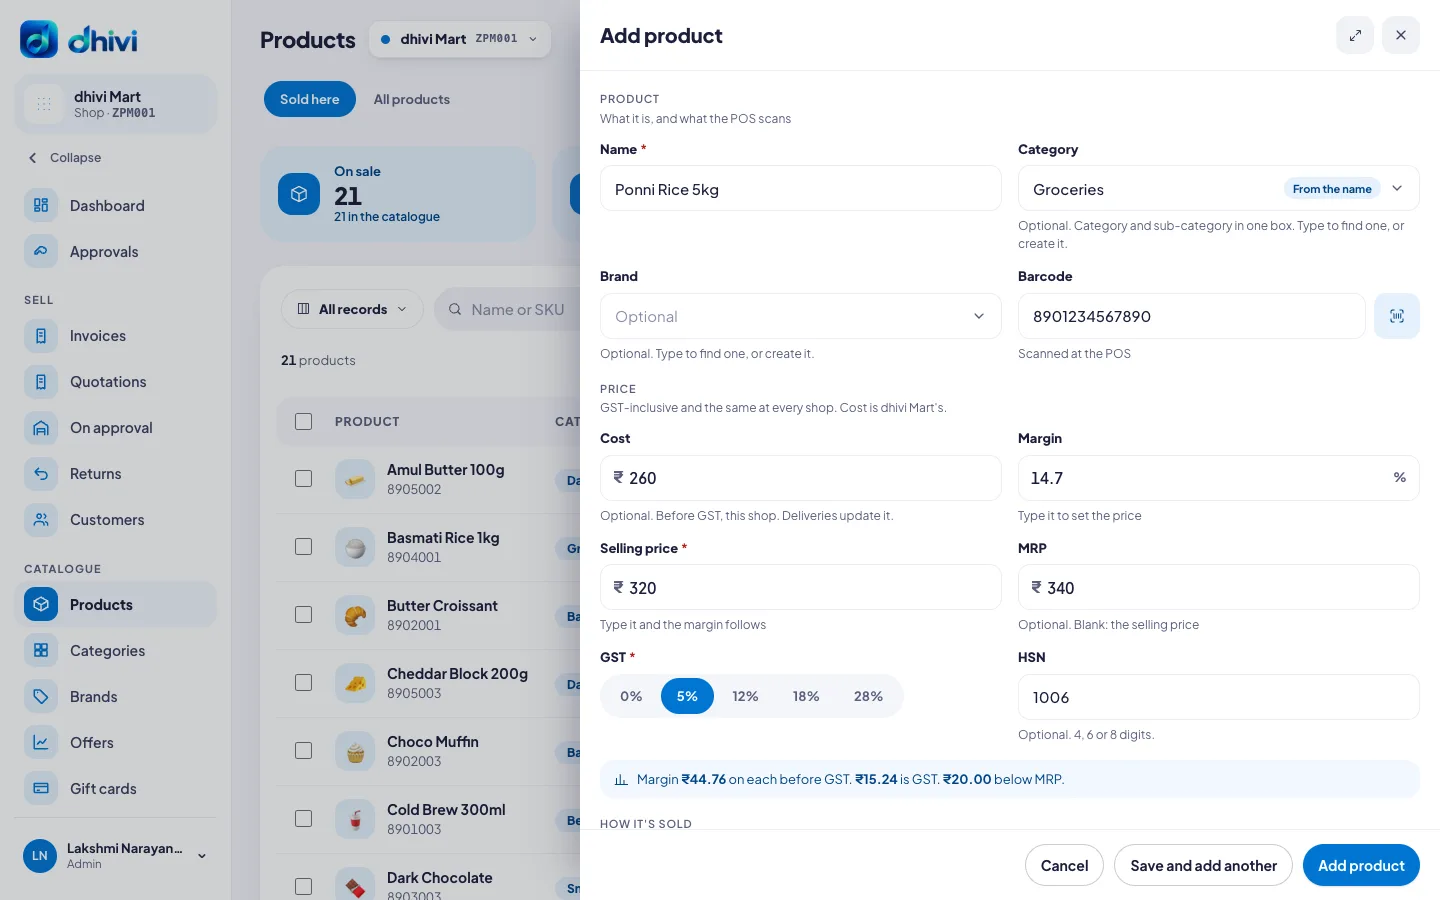
- Type the Name, for example Ponni Rice 5kg.
- Pick a Category, or type a new one to create it. dhivi POS often suggests one from the name.
- Pick a Brand if you like, or type a new one.
- Scan or type the Barcode from the packet. Leave it blank and dhivi POS makes one for you.
- Under Price, type the Cost (what you pay, before GST) and the Selling price. Or type the Margin % and the selling price is worked out.
- Type the MRP printed on the packet. The selling price follows the MRP until you change it.
- Pick the GST rate. Add the HSN code if you have it.
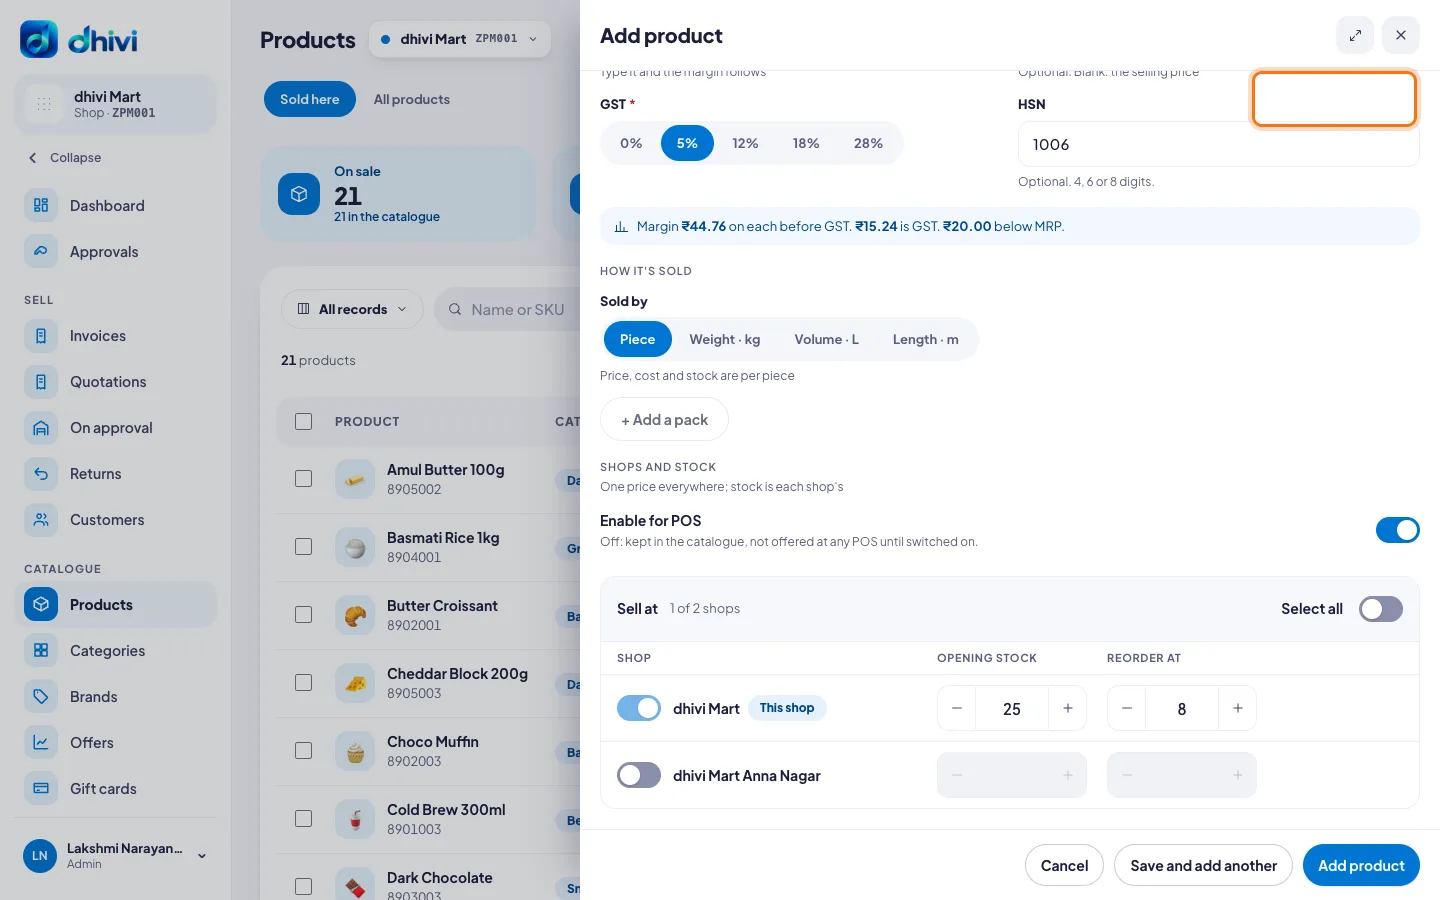
- Under Shops and stock, keep Enable for POS switched on.
- Under Sell at, switch on each shop that sells it. Type its Opening stock and Reorder at level.
- Click Add product. To add the next one straight away, click Save and add another.
Good to know
- A product has one name and one price at every shop. Each shop's cost, stock and reorder level are its own.
- Changing a product sold at more than one shop changes it at every shop — so a manager of one shop can change the name and price only for products their shop alone sells.
- Setting a price needs the Set prices permission. Adding a product to other shops needs Products at all my shops.
- Selling loose rice or sugar? Under How it's sold, pick Weight · kg. See Sell by weight and in packs.
- Many products? Use Import on the Products page to add them from a spreadsheet.